11 January 2019
Sitecore Entity Composer, End-to-End: Part 1 - Extending the Entities

Sitecore Experience Commerce includes a feature called the Entity Composer which allows you to use the Commerce Business Tools to edit the structure of the entities stored in the system. This makes it much easier to do things like adding fields to products or customers, which previously would have been a development task. I blogged about this earlier on the community site giving a basic example of the functionality, which you can see here.
In this series I wanted to walk through a full end-to-end demo, showing not only how to add new fields to the Products, but also how to make use of these fields on the Storefront. In this scenario I'm going to extend the Sellable Items to introduce some extended Manufacturer information consisting of the country the item was manufactured in and also whether the item was assembled by hand or by machine.
This post is going to be split into 3 parts:
- First we’re going to start by extending the commerce entities.
- In the second part we’re going to see how that data flows through the Item Data Provider into the Content Tree and Solr indexes.
- In the final part we’ll leverage the inbuilt SXA functionality to display the data in a couple of different forms on the Storefront.
And the really cool bit is we’ll complete all of this without writing a single line of code!
So let’s get started….
Extending the Sellable Item entity
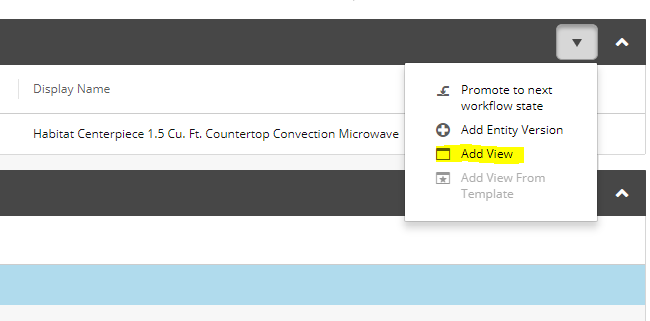
We begin by loading up one of the Sellable Items in the Commerce Business Tools and creating a new version so we can edit its details. We switch over to the new draft entity version and we can then use the Add View option in the drop down from the Summary section.
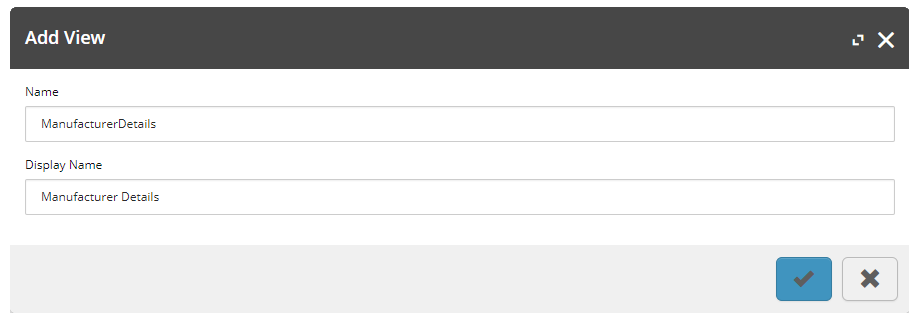
This brings up the Add View popup, which we’re going to populate with the name and display name seen here:
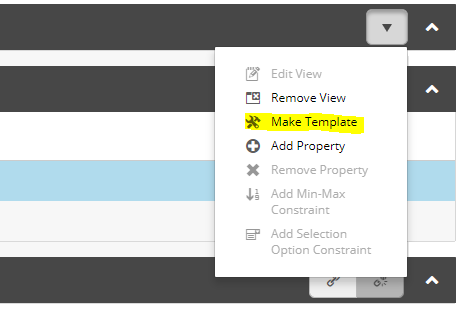
We confirm the dialog and we can now see this View displayed as a section in the Sellable Items details. Next we need to convert this view into a Template to make it available for other entities, and do this using the drop menu on the newly rendered Manufacturer Details section
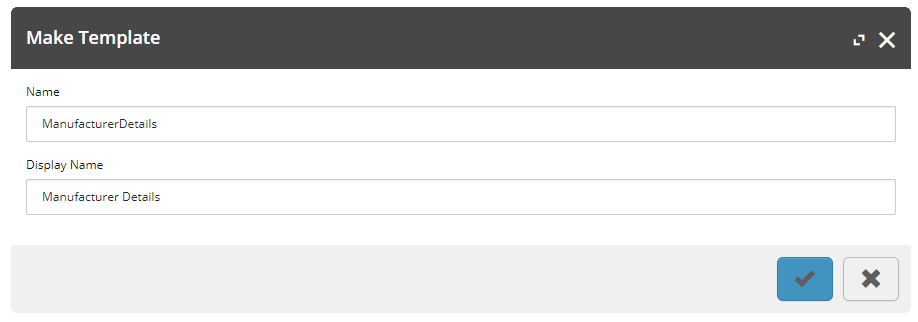
We get a similar dialog to previously and again populate it with the Manufacturer Details name.
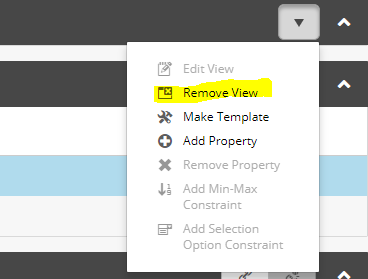
Now what we want to do here is to remove the first view we created on this Sellable Item, the reason being that we’re going to assign this newly created template to all of the Sellable Items and that would result in this entity actually having 2 instances of the view assigned which we don’t want. To do this we again use the dropdown on the view that was created, but this time we select Remove View.
Now we jump to the main Composer section of the Commerce Business tools, you can find this in the left hand navigation. Once in there we can see the new Manufacturer Details template listed and we can load it up to enter its details.

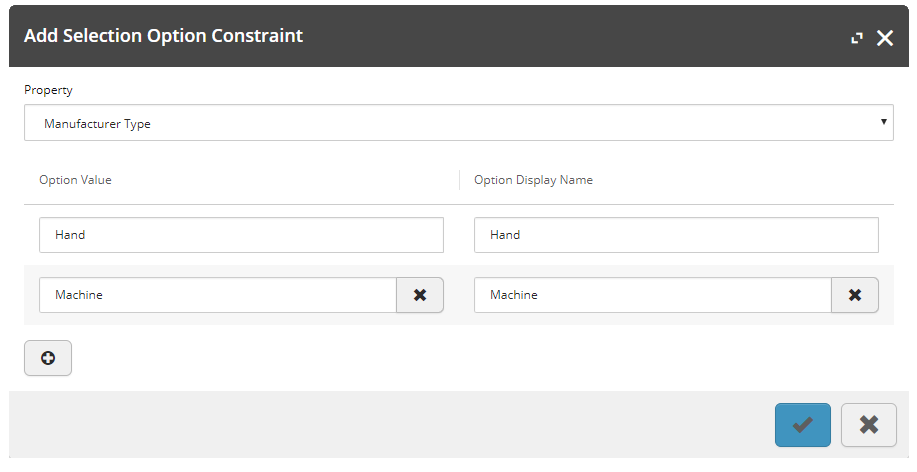
Once we load up the view’s details we can use the bottom section to add the properties we require to the view. In this case we’re going to add our 2 new fields, Country of Origin & Manufacturer Type. Both of these fields are going to be of type string, however with the Manufacturer Type field we’re going to set some Options Constraints.
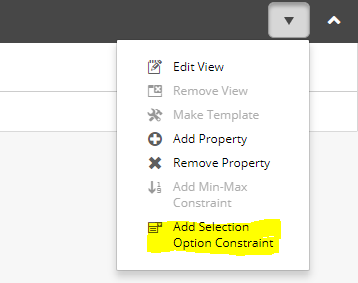
This will allow us to set two possible answers for users to select from, whether the item was assembled by hand or by machine.
The final thing that we need to do is to assign this template to the Sellable Items in the system, so that the fields are available to be populated on all of the products we have for sale on the site. You do this using the three buttons on the Details panel.
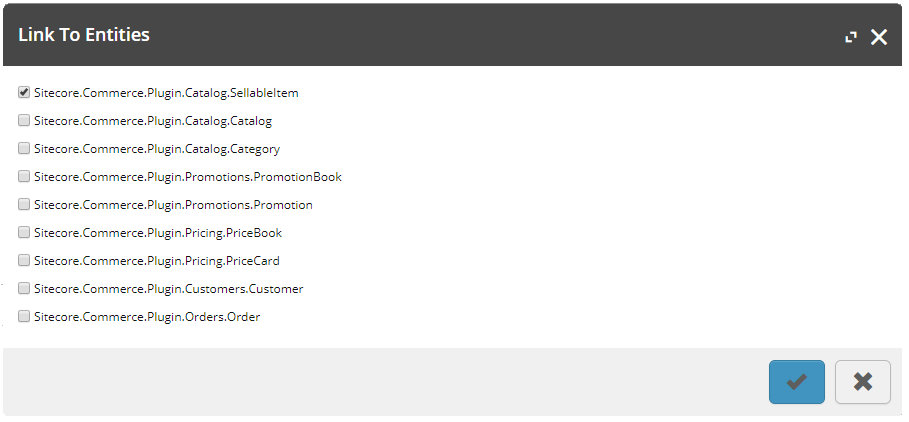
The first of these buttons allows you to assign the view to entities based on the Tags, the second button allows you to assign the view to all entities of a certain type, and the final third button allows you to assign the view to all entities that match a specific Item Definition. We’re going to use the second button and assign the template to all of the Sellable Items in the system.
Now we’ve assigned it to all of our Sellable Item entities we just need to go and populate the data for them and then we’ve finished the Commerce side of this.
Summary
So in this first post we’ve created a new Entity Composer Template, added some fields to it, assigned it to all of our Sellable Items and finally populated this data for some of the items. In the next part we’ll look into the Item Data Provider and look into how these changes we’ve made will be pulled across into the Sitecore Content Tree and the Solr indexes.
You can read the second post in this series here.