Sitecore Entity Composer, End-to-End: Part 2 - Data Flows
Wednesday, January 16, 2019
This is the second part in a blog series demonstrating a complete end-to-end scenario for Sitecore Experience Commerce and the Entity Composer. If you haven’t read part 1 already then you can find it here.
The Content Editor
In the first post we used the Entity Composer to extend our Sellable Item definition to include two new fields. We then assigned those new fields to our Sellable Items and finally made sure that we populated some of them with data. In this post we’re going to take a look into how this data will make its way into the Sitecore Content tree and Solr indexes.
So we’re going to jump over to the Content Editor now, and the first thing we’re going to do is to use the Commerce Ribbon, and select the “Update Data Templates” button.

This will cause Sitecore to pull in the data templates specified in the Commerce Databases and update the Sitecore templates based on these. Once this is complete you should now see the Manufacturer Details template we created in the Content Tree at this location: /sitecore/templates/Commerce/Catalog Generated/Components/ManufacturerDetails.
Note: there is an issue with the sync here to do with the how the template inheritance works out of the box and we need to fix it up before we can carry on. If you look at the generated template you will see that it is mistakenly inheriting from itself creating a circular dependency, we first of all need to just remove that base template inheritance. The next thing we need to do is to make our Sellable Item template inherits from our generated ManufacturerDetails template. You’ll find the Sellable Item template at: /sitecore/templates/Commerce/Catalog Generated/ConnectSellableItem.
Now in the Content Tree you can can navigate to one of the Sellable Items who you previously populated our custom entity view fields on, and you should see the fields are populated!

Solr
What we want to do next is to get this data into the Solr index, the first thing we need to do is complete a site publish to push the changes we made previously to the web database.
Note: if you’re using XC 9.0.3 there is an issue with the commerce environment being used by the web index which will stop the custom fields from being indexed. It is set to use the HabitatAuthoring environment by default but you’ll need to change this to use HabitatShops environment instead, this is found in the /App_Config/Include/Y.Commerce.Engine/Sitecore.Commerce.Engine.Connectors.Index.Solr.config, however you should change the value using a config patch to make future upgrades easier.
Now as we updated the template inheritance in the previous step that change won’t get picked up as an incremental change for the index provider to process, so we need to complete a full index rebuild to cause all of the Sellable Items to be reindexed with our new fields included.
Once you’ve completed the rebuild you can navigate to your Solr instance to test that the data has been indexed correctly.

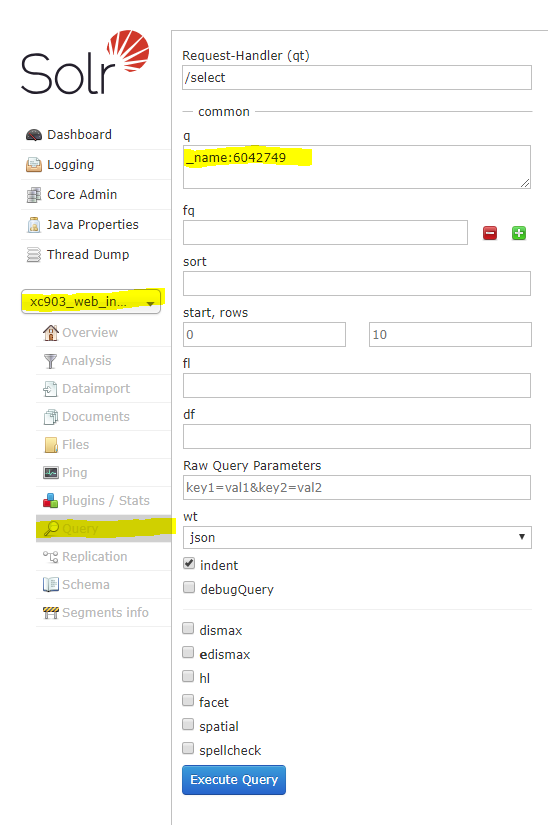
If you look at the image above, you can see that we selected the web index from the dropdown, then we selected the Query menu, and finally we entered the query “_name: 6042749”. This will find all of the index documents which contain a field with the name “_name” and the value “6042749”, which is the product id of the product we’re searching for.

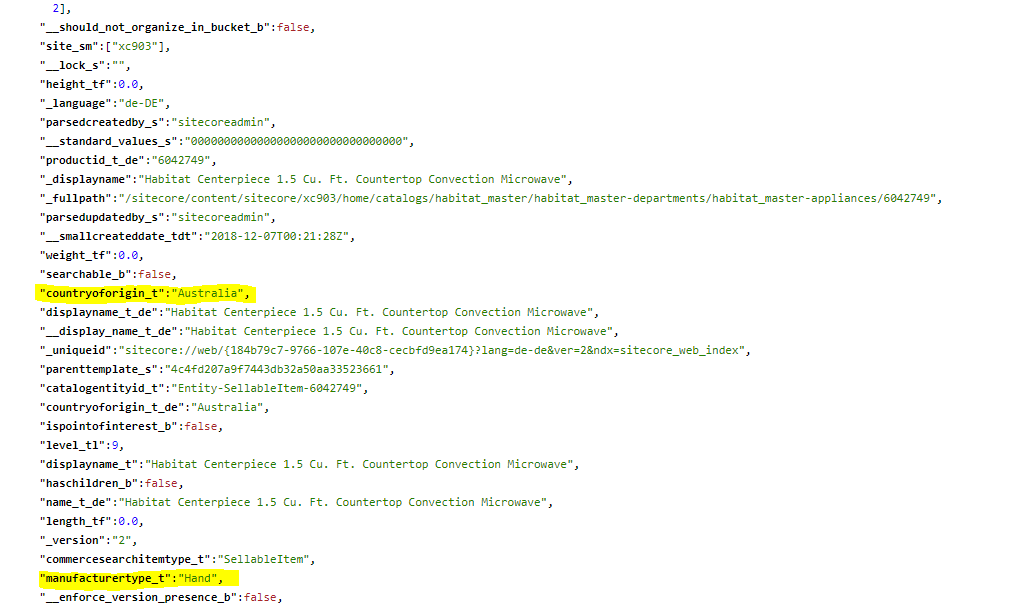
When we run the query, we’re returned the index document’s content in JSON format and we can search this document for the custom fields that we added. If you look at the JSON above you can see the various out of the box fields for the Microwave we searched for and also the two custom fields we added, which I’ve highlighted.
Now that data has made it into Solr, it opens up a lot of possibilities for what we can do with this data as most of the controls provided with SxA Storefront populate their data from the index, which means we can start to leverage the data on the Storefront and I’ll cover how you can do this in Part 3 of this series.
You can read the third and final post in this series here.