18 January 2019
Sitecore Entity Composer, End-to-End: Part 3 - The Storefront

This is the third and final part in my blog series demonstrating a complete end-to-end scenario for Sitecore Experience Commerce and the Entity Composer. If you haven’t read parts one and two already then you can find them here and here.
In the previous two blog posts we extended our Sellable Items to include two new fields for "Country of Origin" and "Manufacture Type". We then showed how that data was passed through into the Content Tree and then indexed and stored in the Solr indexes. In this final post of the series we’re going to use the data that’s stored in the index to extend the functionality on the Storefront.
Custom Facet
The first thing we’re going to do is to add these two fields in as new search facets. This will allow the end users to refine the products listed in category pages by the data in the two fields we added.
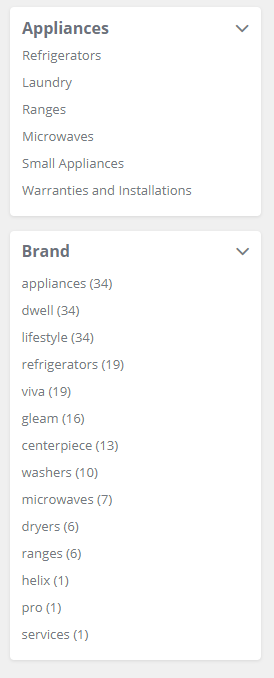
If you look at how the facets are configured out of the box, we have the category currently being viewed, followed by the ability to refine the listing by "Brand", we want our new fields to be listed in the same manner that the existing "Brand" one is.
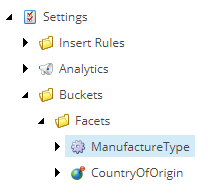
The catalog pages in SXA Storefront pull their facet data from the default Bucket facets located at: /sitecore/system/Settings/Buckets/Facets, so we need to add our new facets under there. I added a new facet item for each of the new manufacturer fields we created in the previous posts - "Manufacturer Type" & "Country of Origin".
I then populated the fields on the items with the following data. You’ll notice that when looking at the field names in Solr they have a "_t" suffix, however you don’t need to include that here.
- Item Name: ManufacturerType
- Name: Manufacture Type
- Field Name: manufacturertype
- Item Name: CountryOfOrigin
- Name: Country Of Origin
- Field Name: countryoforigin
We can publish these new items out to the web DB then the last thing we need to do is to add these new facets to the Category Page facet definition list. You can find the template here: /sitecore/templates/Commerce/Catalog/Commerce Category.
If you edit the templates Standard Values you will see a list field called "Runtime Search Facets". We just have to add our new facets to the selected list and then publish the item and we’re done.
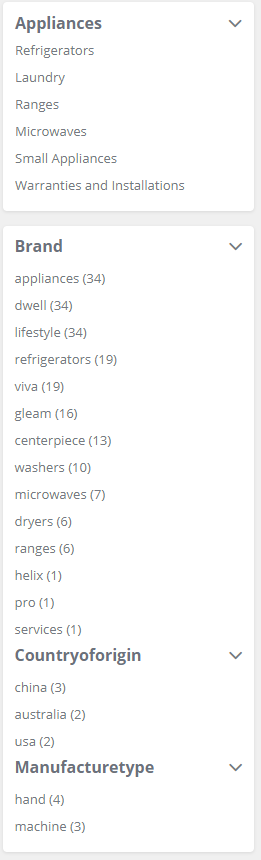
Now you can see, when we return to the Category page, that our new Facets are displayed. What’s more this facet control has smarts built in, so if you view a category where none of the products have that field populated then the facet won’t be displayed.
Product Detail Page
The next way we can use these new pieces of data is to also display them on the Product Details page and we’re going to do this by making use of the Rendering Variants feature in SXA. The first thing we’re going to do is to follow the instructions on the doc site to change the Product Information to be displayed using rendering variants.
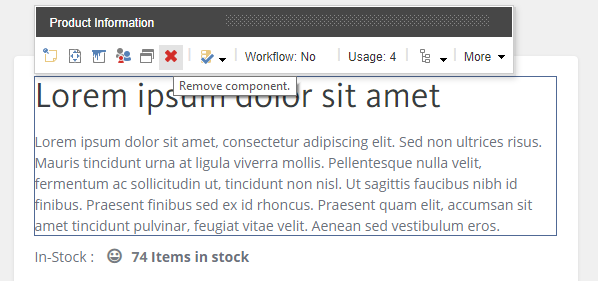
We start by loading up the Product Detail page in the Experience Editor, once it's loaded we’re going to remove the default Product Information rendering.
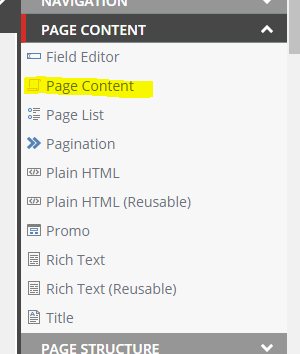
Once removed we’re going to replace it with a control called "Page Content", found inside the toolbox section also called "Page Content".
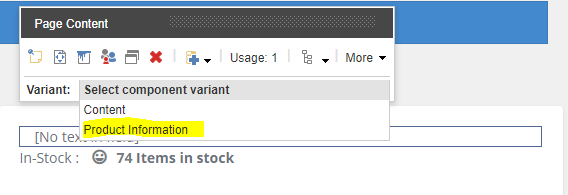
We drag it onto the page and then we need to change the variant being displayed to the Product Information variant.
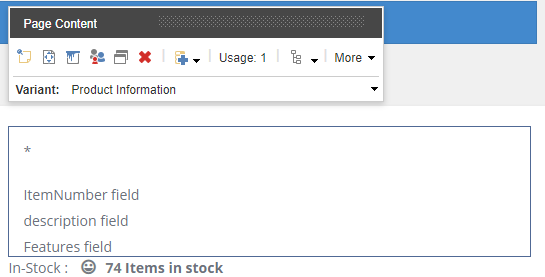
The first thing that you’ll notice is that the rendering variant that we’ve dropped in, looks a bit different than the control we removed. This is to be expected as its markup is now being controlled by items in the content tree, and this is what allows us to control what is being output.
To do this we’re going to save our changes and jump back into the Content Tree. The Items that control how this rendering variant is displayed are stored at: /sitecore/content/<<Tenant>>/<<Site>>/Presentation/Rendering Variants/Page Content/Product Information.
If you expand the tree below this node you can see the various items that are responsible for rendering this component.
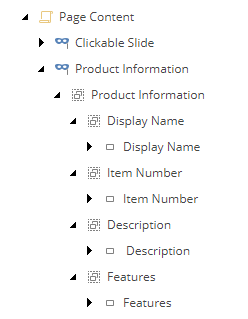
We’re going add to the structure to include the data for our two new fields. This involves adding in a new VariantSection and VariantField items in the structure, so you end up with the content tree looking like this:
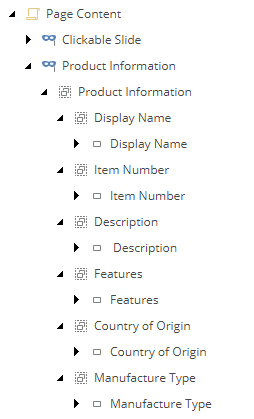
The inner items are the ones that are responsible for outputting the actual values of the field from the Solr index. In this case I’ve also added a prefix to be rendered with the field value. So the items are populated with the following values:
- Item Name: ManufacturerType
- Field Name: manufacturertype
- Prefix: Manufacture Type:
- Item Name: Country Of Origin
- Name: countryoforigin
- Field Name: Country of Origin:
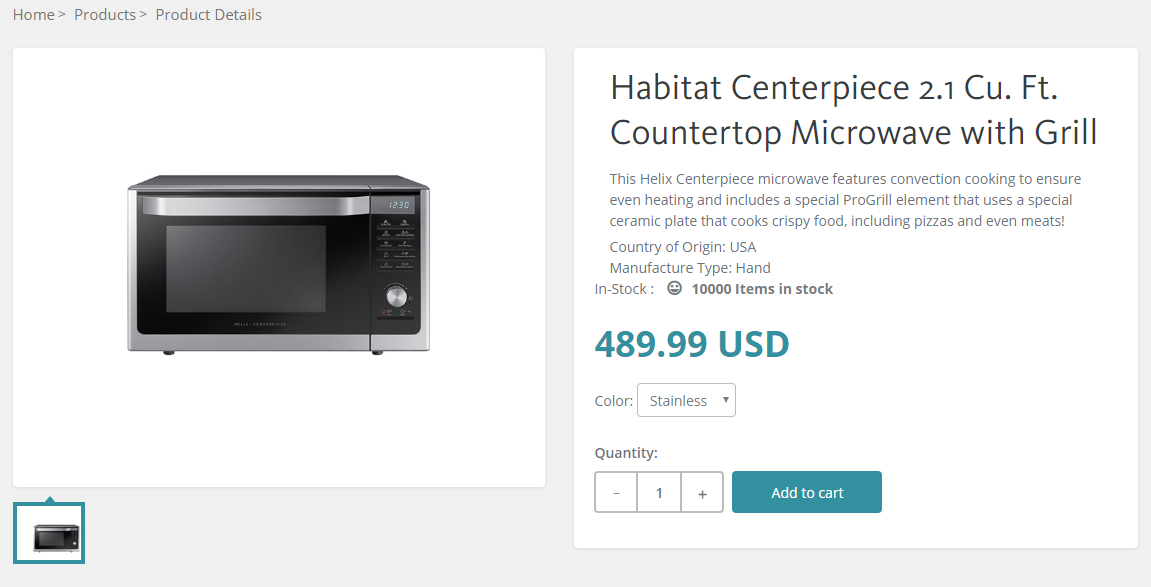
We can now publish our site, so that the changes to the Product Details page and the changes to the rendering variant items are all pushed out to the web database and then we’re done! We can now view the product detail page for one of the Sellable Items that we populated the new fields for and we can see the data being displayed.
Conclusion
So that concludes this series. We’ve performed a few different actions throughout the series but the end result is that we’ve managed to:
- Change the structure of our Sellable Item entities in the commerce engine,
- Have that data flow through to the content tree and Solr index,
- Finally make use of that data in the Solr index to populate a few different controls on the Storefront.
Crucially we did all of this without writing a single line of code, showing how much freedom and power merchandisers and marketers have when they build their sites using Sitecore Experience Commerce.